Deploy On-Premise Infra on Rancher v1.6.x
![]()
This tutorial explains how to setup a highly available 3-nodes cluster to run OctoPerf On-Premise Infra. As a result, we use Rancher v1.6.x to orchestrate the cluster.
We're going to use cloud instance on Digital Ocean for both the rancher server and the rancher worker nodes.
Rancher v1.6.x is still maintained but support will be discontinued end 2019. Rancher v1.6.x is still a very good docker cluster orchestration tool because it's very simple to use.
Prerequisites
This tutorial requires:
- A Digital Ocean account,
- Basic knowledge around managing Ubuntu linux via SSH,
- And basic knowledge of how Docker works.
Topology
The infrastructure built in this tutorial works as following:
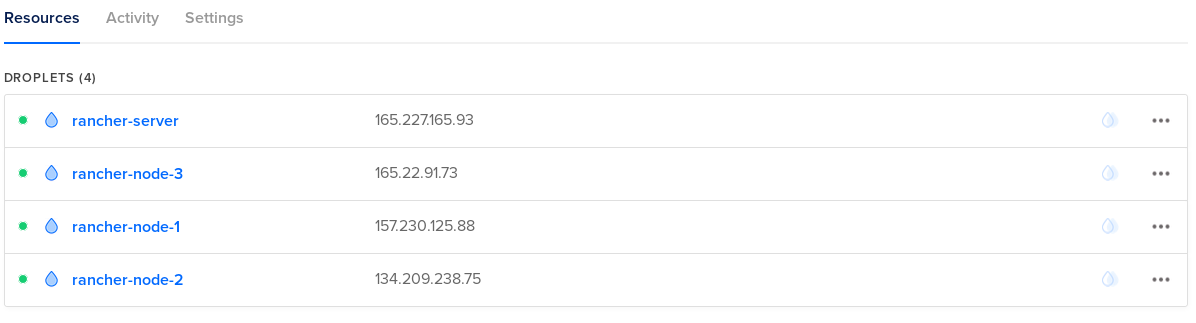
- rancher-server: hosts the rancher server only,
- rancher-node-1: acts as rancher node,
- rancher-node-2: acts as rancher node,
- rancher-node-3: acts as rancher node.
All the containers are running on rancher-node-X. Elasticsearch is deployed on all 3 nodes. OctoPerf On-Premise Infra Backend is deployed on all 3 nodes.
Rancher Server
First, we need to spin-up the Rancher server. The server is going to run on a dedicated instance:
- Spin up a Digital Ocean instance by selecting
MarketplaceDocker xxx on Ubuntutype of instance. Name itrancher-serverto easily recognise it. A server with2 CPUsand4GB RAMis enough for testing purpose.
- SSH into the instance once it up and running, and disable the firewall:
root@rancher-server:~# sudo ufw disable
Firewall stopped and disabled on system startup
- Start the rancher
v1.6.xserver:
mkdir rancher-v1.6.x
docker run -d -v /root/rancher-v1.6.x:/var/lib/mysql --restart=unless-stopped -p 8080:8080 rancher/server:stable
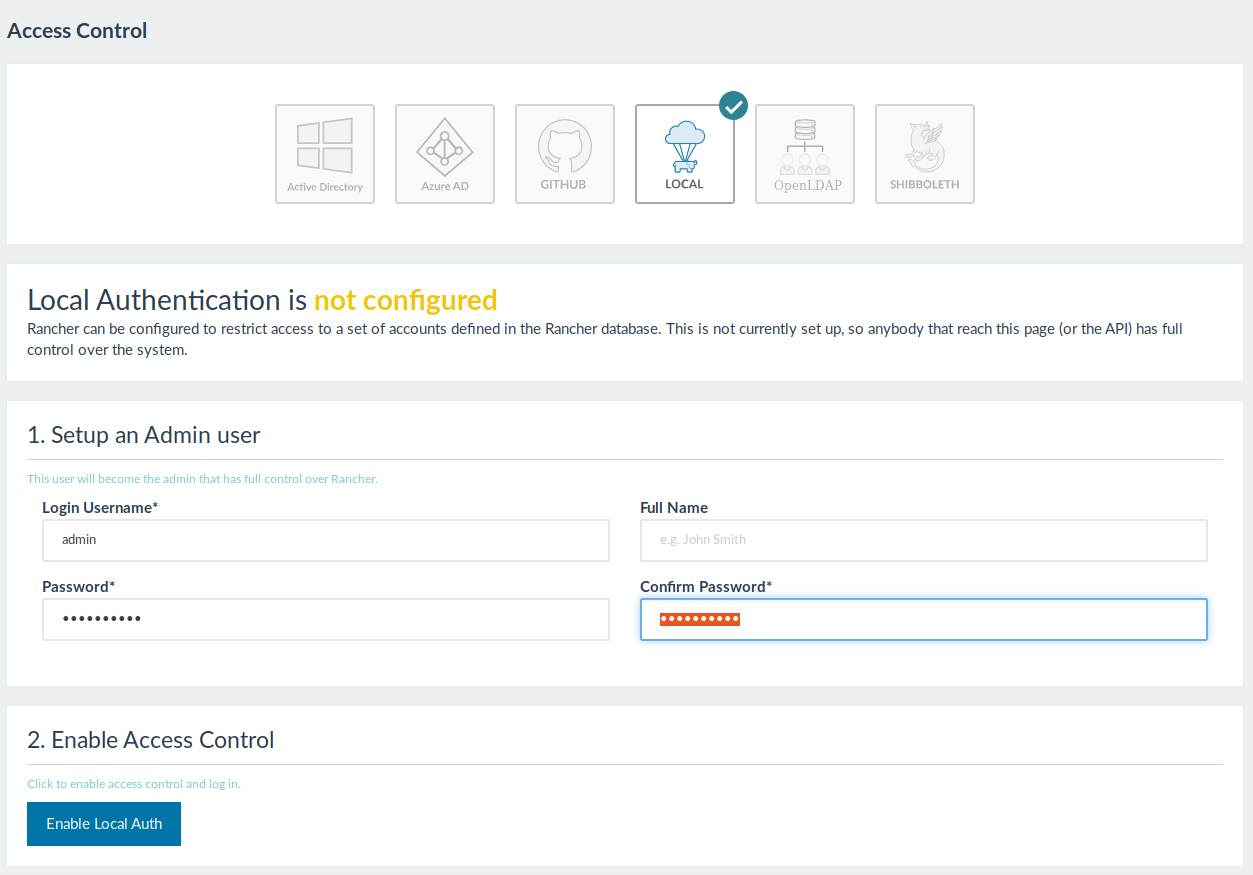
- Open
http://RANCHER_IP:8080in your web browser, then go toADMIN > Access Control. EnableLocal Authenticationand provide a username and a password to secure your rancher server.
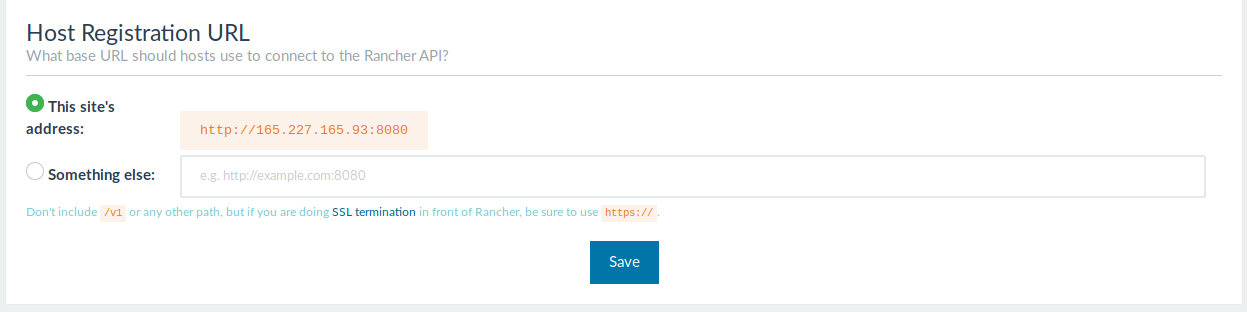
- Verify
Host Registration URLis pointing to the public IP inADMIN > Settings. Click onSaveto apply settings,
Rancher server is now ready to use.
Rancher Nodes
Cloud Configuration
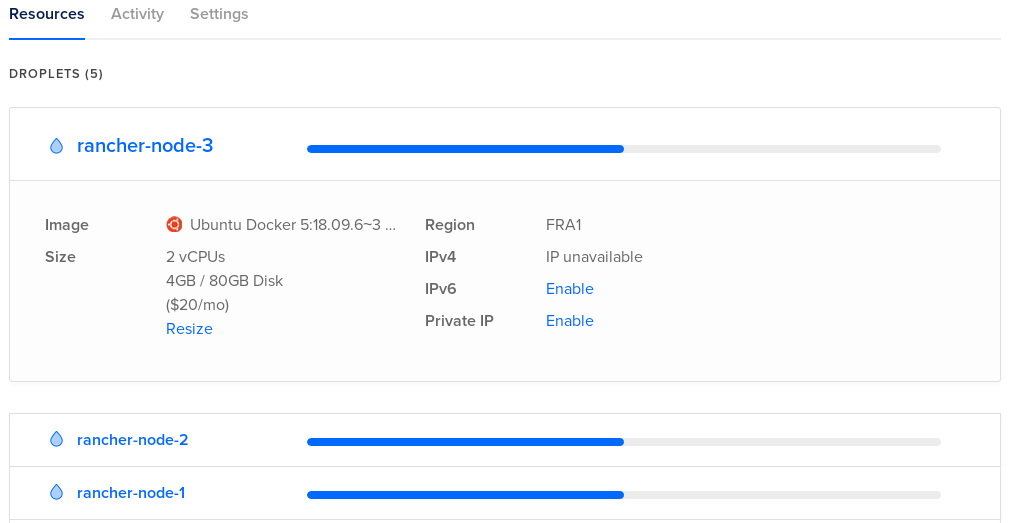
3 rancher nodes are going to host the docker containers to run OctoPerf On-Premise Infra. Launch 3 nodes (with Docker preinstalled from Marketplace) and name them rancher-node-1, rancher-node-2 and rancher-node-3 respectively.

2 CPUs with 4GB RAM standard instances are enough for testing purpose. Consider using at least 6 CPUs with 16GB RAM per node in a production setup.
OS Configuration
Once the nodes are up and running:
- SSH into each node,
- Increase
vm.max_map_countpermanently:
root@rancher-node-1:~# sudo nano /etc/sysctl.conf
- Add the following line to the end of the
sysctl.conffile:
vm.max_map_count=262144
- Save and quit, then update
systcl:
root@rancher-node-1:~# sudo sysctl -p
vm.max_map_count = 262144
- Disable the firewall: (otherwise networking between nodes will fail)
root@rancher-node-1:~# sudo ufw disable
Firewall stopped and disabled on system startup
- Install basic software for proper security and clock synchronization:
root@rancher-node-1:~# sudo apt install -y fail2ban ntp
Repeat those operations for rancher-node-1, rancher-node-2 and rancher-node-3. We now have 3 nodes with Docker installed and preconfigured to easily run Elasticsearch.
Host Registration
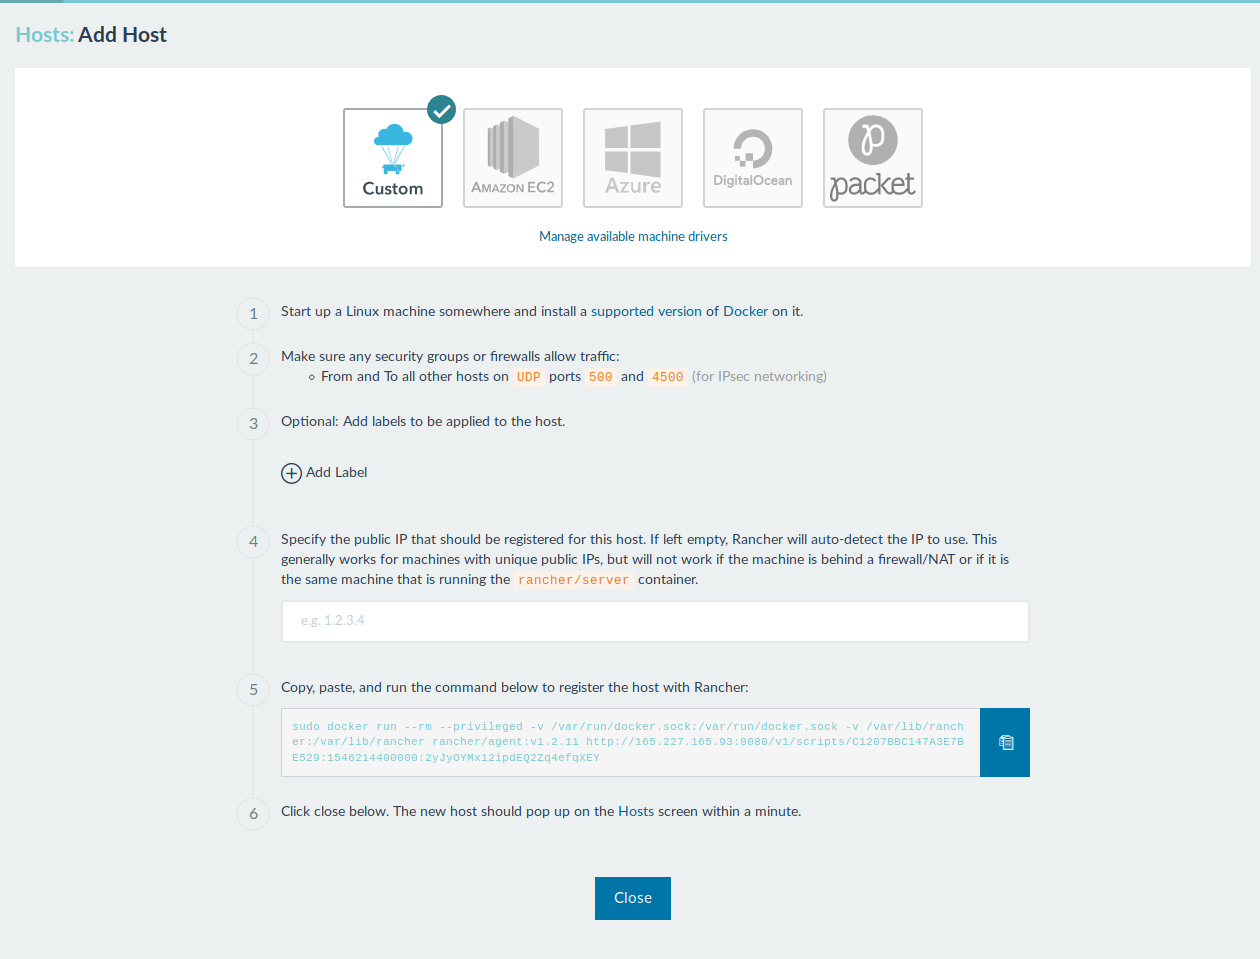
The next step is to add the hosts to our rancher server:
- Open Rancher Web UI,
- Click on
INFRASTRUCTURE > Hosts, - Click on
Add Hostbutton, - Select
Customhost type, - Copy and execute the command-line provided by Rancher on each of the nodes through SSH.
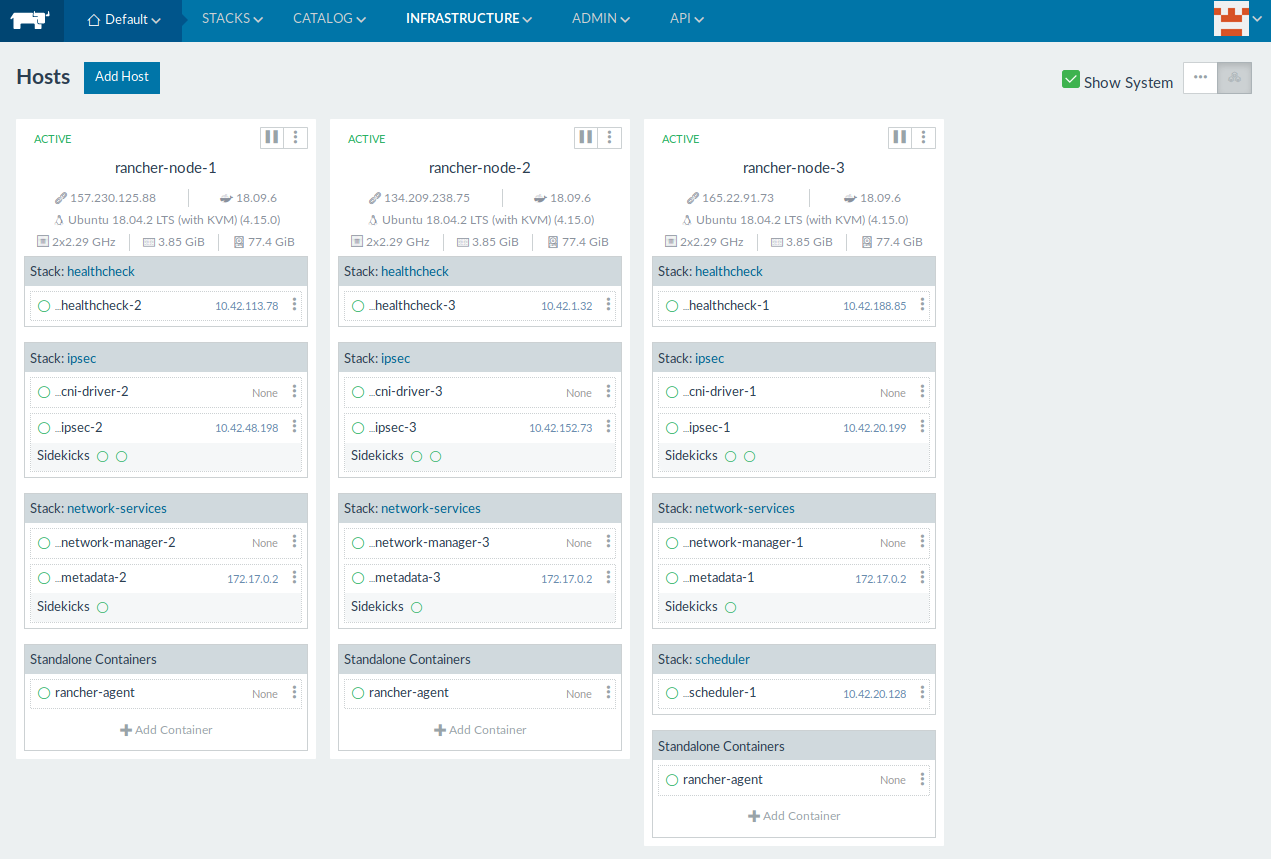
After a few minutes, all hosts should be registered and visible in Rancher Web UI. All system services should be shown as green dots. At this stage, we have a working rancher server connected to the 3 rancher hosts rancher-node-1, rancher-node-2 and rancher-node-3.
Once all hosts are registered:
- Edit each host through Rancher Web UI,
- Add a label with name
nameand valuerancher-node-X(whereXis the number of the node).
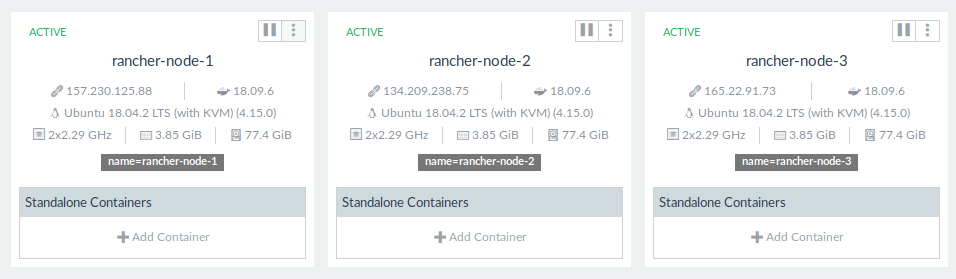 Each host has the label
 name=rancher-node-X
Those labels are subsequently used in stacks below to assign containers to specific hosts.
Elasticsearch Stack
Topology
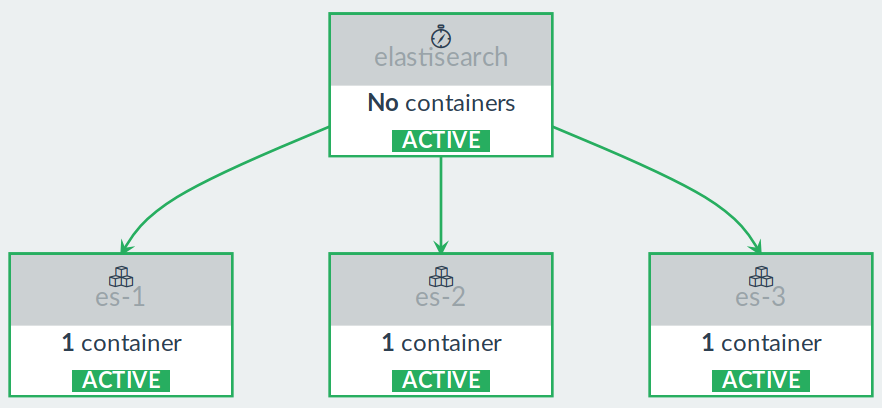 Elasticsearch Stack Graph
Each Elasticsearch container will:
- running as 3 separate services, each running a on separate host,
- use a volume mapping from
/usr/share/elasticsearch/data(inside the container) to/root/elasticsearch(on the host), - be running all roles including
master,ingestanddata, - be named
es-1,es-2andes-3and respectively run onrancher-node-1,rancher-node-2andrancher-node-3.
Local Directory
First, let's create the elasticsearch directory on each rancher node:
root@rancher-node-1:~# pwd
/root
root@rancher-node-1:~# mkdir elasticsearch
root@rancher-node-1:~# chmod 777 elasticsearch/
root@rancher-node-1:~#
Now we have a /root/elasticsearch writeable directory on each rancher node.
Stack
Let's now create the Elasticsearch stack. Its purpose is to contain all Elasticsearch related services:
- Open Rancher Web UI,
- Click on
STACKS, - Click on
Add Stack, - In name, enter
elasticsearch, - Copy and paste the following content into the
docker-compose.ymlfield:
version: '2'
services:
  elastisearch:
    image: rancher/dns-service
    links:
    - es-3:es-3
    - es-2:es-2
    - es-1:es-1
  es-3:
    image: docker.elastic.co/elasticsearch/elasticsearch-oss:7.1.1
    environment:
      network.host: 0.0.0.0
      ES_JAVA_OPTS: -Xms512m -Xmx512m
      cluster.initial_master_nodes: es-1, es-2, es-3
      discovery.seed_hosts: es-1, es-2, es-3
      node.name: es-3
    stdin_open: true
    volumes:
    - /root/elasticsearch:/usr/share/elasticsearch/data
    tty: true
    labels:
      io.rancher.container.pull_image: always
      io.rancher.scheduler.affinity:host_label: name=rancher-node-3
  es-2:
    image: docker.elastic.co/elasticsearch/elasticsearch-oss:7.1.1
    environment:
      network.host: 0.0.0.0
      ES_JAVA_OPTS: -Xms512m -Xmx512m
      cluster.initial_master_nodes: es-1, es-2, es-3
      discovery.seed_hosts: es-1, es-2, es-3
      node.name: es-2
    stdin_open: true
    volumes:
    - /root/elasticsearch:/usr/share/elasticsearch/data
    tty: true
    labels:
      io.rancher.container.pull_image: always
      io.rancher.scheduler.affinity:host_label: name=rancher-node-2
  es-1:
    image: docker.elastic.co/elasticsearch/elasticsearch-oss:7.1.1
    environment:
      network.host: 0.0.0.0
      ES_JAVA_OPTS: -Xms512m -Xmx512m
      cluster.initial_master_nodes: es-1, es-2, es-3
      discovery.seed_hosts: es-1, es-2, es-3
      node.name: es-1
    stdin_open: true
    volumes:
    - /root/elasticsearch:/usr/share/elasticsearch/data
    tty: true
    labels:
      io.rancher.container.pull_image: always
      io.rancher.scheduler.affinity:host_label: name=rancher-node-1
Info
Please adjust Elasticsearch version to the latest one being used by the On-Premise Infra. As of writing, OctoPerf uses Elasticsearch 7.1.1.
- Copy and paste the following content into the
rancher-compose.ymlfield:
version: '2'
services:
  elastisearch:
    start_on_create: true
  es-3:
    scale: 1
    start_on_create: true
  es-2:
    scale: 1
    start_on_create: true
  es-1:
    scale: 1
    start_on_create: true
- Upload those files when creating the stack.
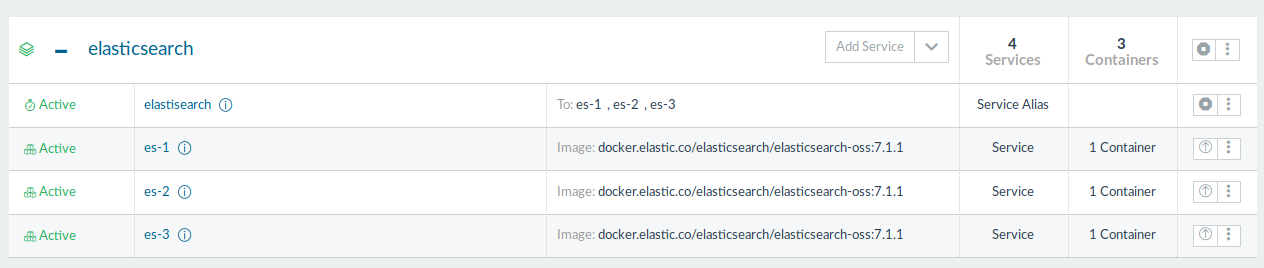
This will automatically create all the Elasticsearch services and run them on each node.
The Elasticsearch stack is composed of 4 services:
es-1: Elasticsearch node running onrancher-node-1,es-2: Elasticsearch node running onrancher-node-2,es-3: Elasticsearch node running onrancher-node-3,elasticsearch: service alias pointing to alles-Xservices. (equivalent of a DNS entry)
OctoPerf Stack
Topology
 OctoPerf Stack Graph
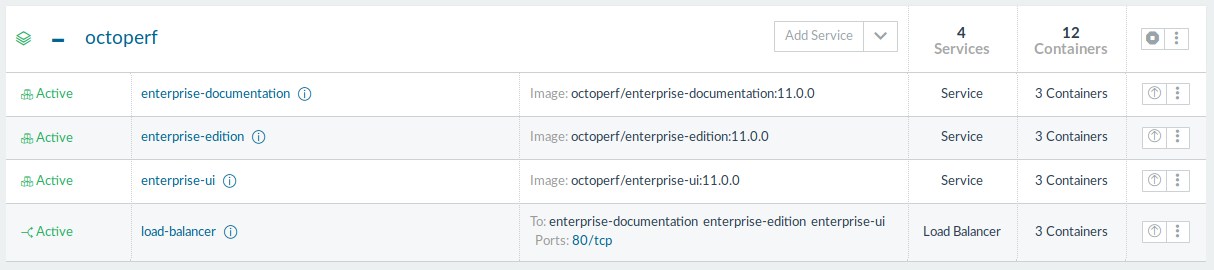
OctoPerf stack contains the following services:
- enterprise-edition: On-Premise backend server which connects to the database and serves the Rest API used by the web ui,
- enterprise-ui: On-Premise frontend server which is a small Nginx web server serving the static HTML / CSS / Javascript files,
- enterprise-documentation: On-Premise documentation server which is a small Nginx web server serving the static HTML / CSS / Javascript files,
- elasticsearch/elasticsearch: service link to the
elasticsearchservice alias inelasticsearchstack previously created, - load-balancer: NGinx front load balancer managed by Rancher which exposes the On Premise Infra services on all rancher-nodes on HTTP port
80(or443for the HTTPS version).
This tutorial supposes you have already setup an Amazon S3 bucket for resources storage. The backend is going to run on all nodes in High availability so the S3 bucket is needed to share the files between all the backends.
Stack
Let's now create the OctoPerf stack:
- Open Rancher Web UI,
- Click on
STACKS, - Click on
Add Stack, - In name, enter
octoperf, - Copy and paste the following content into the
docker-compose.ymlfield:
version: '2'
services:
  enterprise-documentation:
    image: octoperf/enterprise-documentation:11.0.0
    stdin_open: true
    tty: true
    labels:
      io.rancher.container.pull_image: always
      io.rancher.scheduler.global: 'true'
  enterprise-ui:
    image: octoperf/enterprise-ui:11.0.0
    stdin_open: true
    tty: true
    labels:
      io.rancher.container.pull_image: always
      io.rancher.scheduler.global: 'true'
  enterprise-edition:
    image: octoperf/enterprise-edition:11.0.0
    environment:
      server.hostname: ANY_RANCHER_NODE_PUBLIC_IP
      elasticsearch.hostname: elasticsearch
      server.public.port: '80'
      clustering.driver: hazelcast
      clustering.members: enterprise-edition
      clustering.quorum: '2'
      storage.driver: s3
      storage.s3.region: eu-west-1
      storage.s3.bucket: junit.octoperf.com
      storage.s3.access-key: S3_ACCESS_KEY
      storage.s3.secret-key: S3_SECRET_KEY
    stdin_open: true
    external_links:
    - elasticsearch/elastisearch:elasticsearch
    tty: true
    labels:
      io.rancher.container.pull_image: always
      io.rancher.scheduler.global: 'true'
  load-balancer:
    image: rancher/lb-service-haproxy:v0.9.11
    ports:
    - 80:80/tcp
    labels:
      io.rancher.container.agent.role: environmentAdmin,agent
      io.rancher.container.agent_service.drain_provider: 'true'
      io.rancher.container.create_agent: 'true'
      io.rancher.scheduler.global: 'true'
Replace ANY_RANCHER_NODE_PUBLIC_IP, S3_ACCESS_KEY and S3_SECRET_KEY by your own configuration. The backend uses S3 to store resource files (such as JMeter logs, csv files etc).
storage.s3.access-key and storage.s3.secret-key point to an IAM user which has only the permission to access the given s3 bucket. Here is an example IAM policy which gives access to junit.octoperf.com s3 bucket:
{
    "Version": "2012-10-17",
    "Statement": [
        {
            "Sid": "Stmt1427454857000",
            "Effect": "Allow",
            "Action": [
                "s3:Get*",
                "s3:List*",
                "s3:Put*",
                "s3:Delete*"
            ],
            "Resource": [
                "arn:aws:s3:::YOUR_BUCKET_NAME",
                "arn:aws:s3:::YOUR_BUCKET_NAME/*"
            ]
        }
    ]
}
Replace YOUR_BUCKET_NAME by the name of your S3 bucket when creating this IAM using AWS Console Web UI.
- Copy and paste the following content into the
rancher-compose.ymlfield:
version: '2'
services:
  enterprise-documentation:
    start_on_create: true
  enterprise-ui:
    start_on_create: true
  enterprise-edition:
    start_on_create: true
  load-balancer:
    start_on_create: true
    lb_config:
      certs: []
      config: |-
        defaults
        compression algo gzip
        compression type application/json text/html text/plain
      port_rules:
      - path: /app
        priority: 1
        protocol: http
        service: enterprise-ui
        source_port: 80
        target_port: 80
      - path: /doc
        priority: 2
        protocol: http
        service: enterprise-documentation
        source_port: 80
        target_port: 80
      - path: /
        priority: 3
        protocol: http
        service: enterprise-edition
        source_port: 80
        target_port: 8090
    health_check:
      healthy_threshold: 2
      response_timeout: 2000
      port: 42
      unhealthy_threshold: 3
      initializing_timeout: 60000
      interval: 2000
      reinitializing_timeout: 60000
- Click on
Createbutton to create the stack.
The stack should be operational after a few minutes. Once all services are up and running (shown as green dots in Rancher web UI), you can browse to http://ANY_RANCHER_NODE_IP to access to OctoPerf On-Premise Infra.
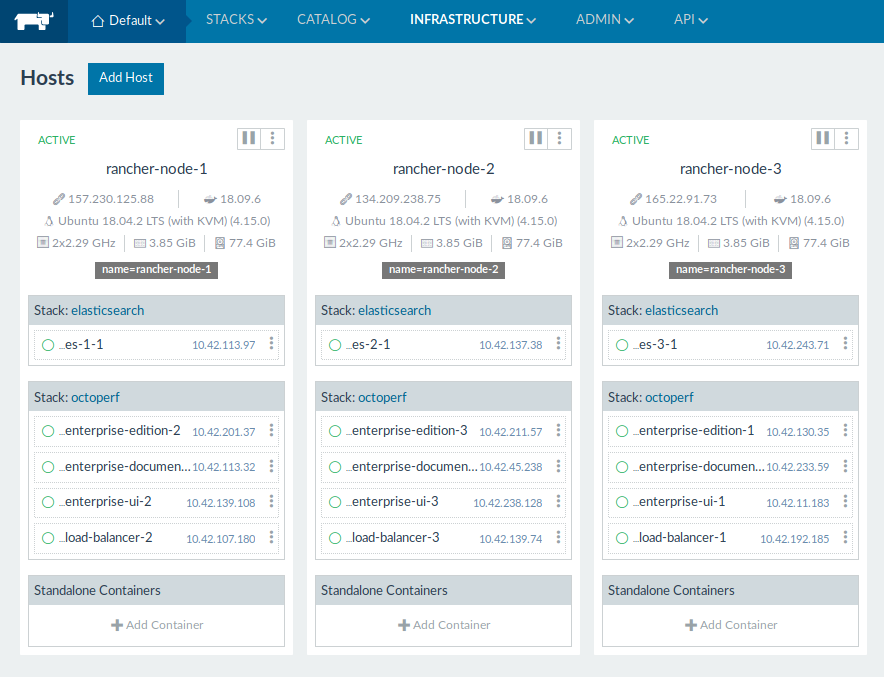 Elasticsearch and OctoPerf stack containers spread accross the 3 nodes cluster
Create an Account
OctoPerf EE comes completely empty. You need to create an account and register a load generator (computer used to generate the load) to be able to run load tests:
- Signup and create a new account,
- Create an On-Premise Provider: providers are groups of load generators,
- And register an On-Premise Agent within the previously created On-Premise Provider.
Congratulations! The setup is now complete.