HTTP Action Servers
The server page lets you configure the Hostname of the application tested. In the Virtual User tree, you can then change the server of each HTTP Request. Having the server centralized like this allows you to quickly test different environments.
Warning
Servers are shared within each project, any action taken on a server can have an impact on another Virtual User.
Server list
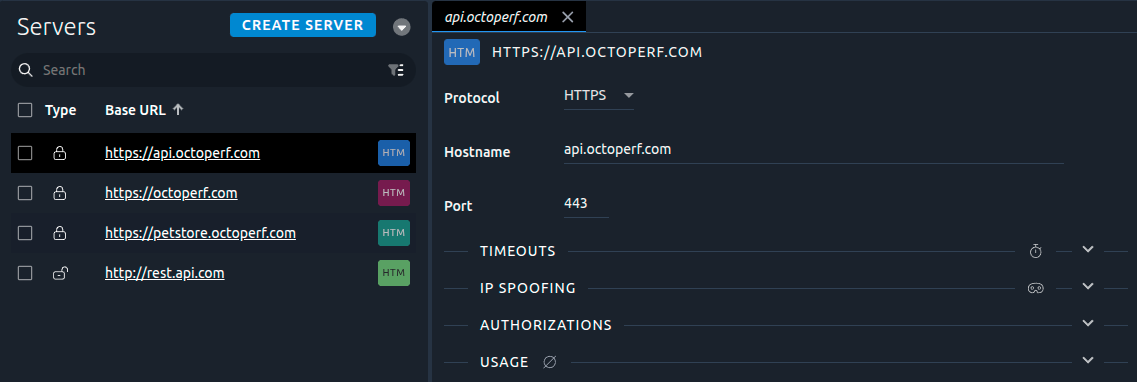
The server page uses a layout with the list on the left and edition on the right. The list features all the usual possibilities as described in the dedicated section about lists.
On top of that, the server list has the following unique features:
Remove Server
Warning
If a server is deleted, all associated HTTP Request Actions are also removed from their Virtual User. As servers are commons to all VUs of a project, server removal and update may affect Virtual Users that you are not currently editing.

The goal of this feature is to easily remove irrelevant HTTP Request Actions from your imported VUs. For example, when you import HAR/JMX files to create a Virtual User, many external requests may have been recorded. Since you probably do not want to load test a third party, it is a good habit to remove those servers that do not belong to you.
Replace servers
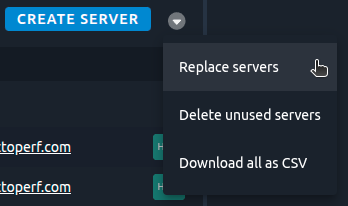
The replace servers button can be used to merge several servers into a single one.
Servers selected on the left hand section will be merged into the one selected in the right hand section.
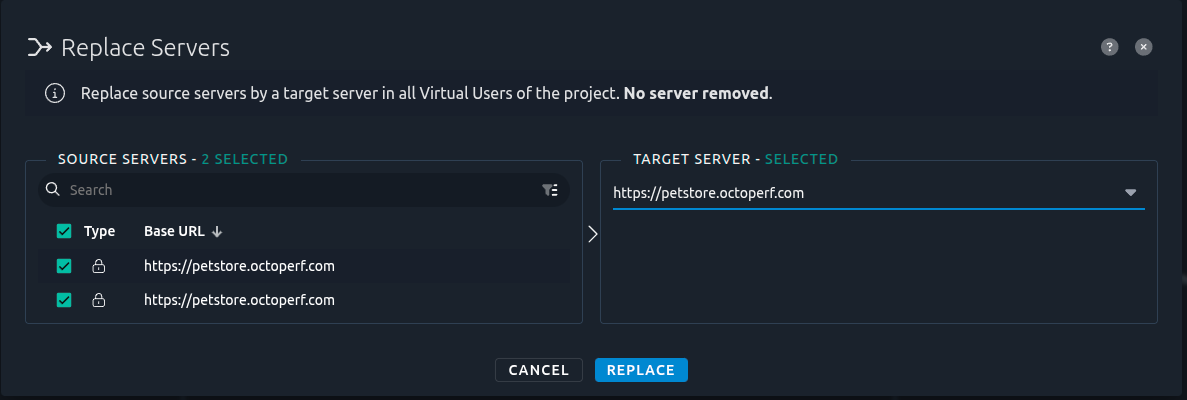
Note
Merged servers are not removed automatically buy you can click the Delete Unused button to do so.
Delete Unused
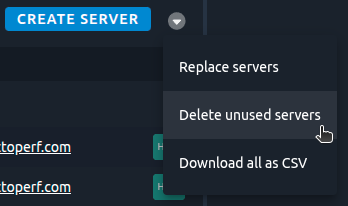
This button will remove all servers that are not used in an HTTP request action.
This can be used to clean after you have created then removed several virtual users. Since servers are shared with the entire project they are not removed along with their virtual users.
Download Servers
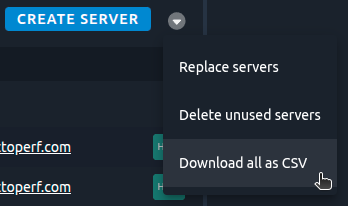
This button downloads the list of servers as a CSV file with protocol, hostname and port for each server:
protocol,hostname,port
HTTP,petstore.octoperf.com,80
HTTPS,httpbin.org,443
Update Server

For each server, you can edit:
| Name | Description |
|---|---|
| Protocol | HTTP or HTTPS |
| Hostname | Domain name or IP address associated to the server machine |
| Port | Usually 80 for HTTP protocol and 443 for HTTPS |
Authorization

The Authorization table lets you specify one or more user credentials for web pages that are protected. The login/password can be provided by a variable using the ${...} syntax (e.g. ${username}).
Basic authentication
Basic authentication usually prompts a login dialog box upon entering the secured Path.
This setting makes OctoPerf transmits the login information when it encounters this type of page, using the required Authorization header and base64 encoding.
The Base path represents the secured path of your server. E.g. / if all pages are restricted or /path if only what comes after this path is secured.
NT Lan Manager
NT LAN Manager (NTLM) is a suite of Microsoft security protocols that provides authentication, integrity, and confidentiality to users.
NTLM credentials are based on data obtained during the interactive logon process and require a domain name on top of the login/password.
Note
NTLM sometimes requires changing the keep alive mode to On. With Auto the last request of your script could be failing.
Kerberos
This authentication type requires both a domain name and a realm name.
In order to use Kerberos you need to upload a jaas.conf file and a krb5.conf file using the files manager. They will be uploaded to the proper folder of each load generator when the test starts.
Here's an example krb5.conf file:
[libdefaults]
default_realm = OCTOPERF.LOCAL

[realms]
OCTOPERF.LOCAL = {
        kdc =
        admin_server = 172.0.0.1
}

[domain_realm]
172.0.0.1= OCTOPERF.LOCAL
.172.0.0.1= OCTOPERF.LOCAL
Note
Kerberos configuration can be quite complex, you can find more a practical example in this blog post.
Timeouts

| Name | Description |
|---|---|
| Connection Timeout | Duration to wait for a connection to open. |
| Response Timeout | Duration to wait for a response. Note that this applies to each wait for a response. Since the server response is usually sent in several chunks, the overall elapsed time may be longer than the timeout. |
Note
If your response is split into several chunks, you can use a Duration Assertion instead of the response timeout. You can for example import this JMX and copy it into your virtual user.
IP Spoofing
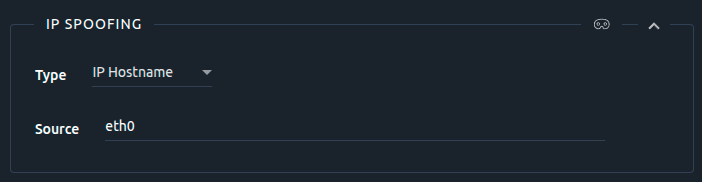
IP spoofing allows you to use multiple network interfaces to inject the load. This feature is only usable with on-premise agents.
Source Address Type
To distinguish the source address value, select the type of these:
- Select IP/Hostname to use a specific IP address or a (local) hostname,
- Select Device to pick the first available address for that interface which this may be either IPv4 or IPv6,
- Select Device IPv4 to select the IPv4 address of the device name (like eth0, lo, em0, etc.),
- Select Device IPv6 to select the IPv6 address of the device name (like eth0, lo, em0, etc.).
Source Address Field
Source IP, Hostname or Device id (Example: 192.168.0.1, eth0, wlan0 etc.).
This property is used to enable IP Spoofing. It overrides the default local IP address for this sample. The JMeter host must have multiple IP addresses (i.e. IP aliases, network interfaces, devices). The value can be a host name, IP address, or a network interface device such as eth0 or lo or wlan0.
For more information, see JMeter HTTP Request documentation related to Source Address Type and Source Address Field.
Warning
Load generator monitoring is disabled when using IP spoofing because JMeter containers are running in host networking mode.
Usage
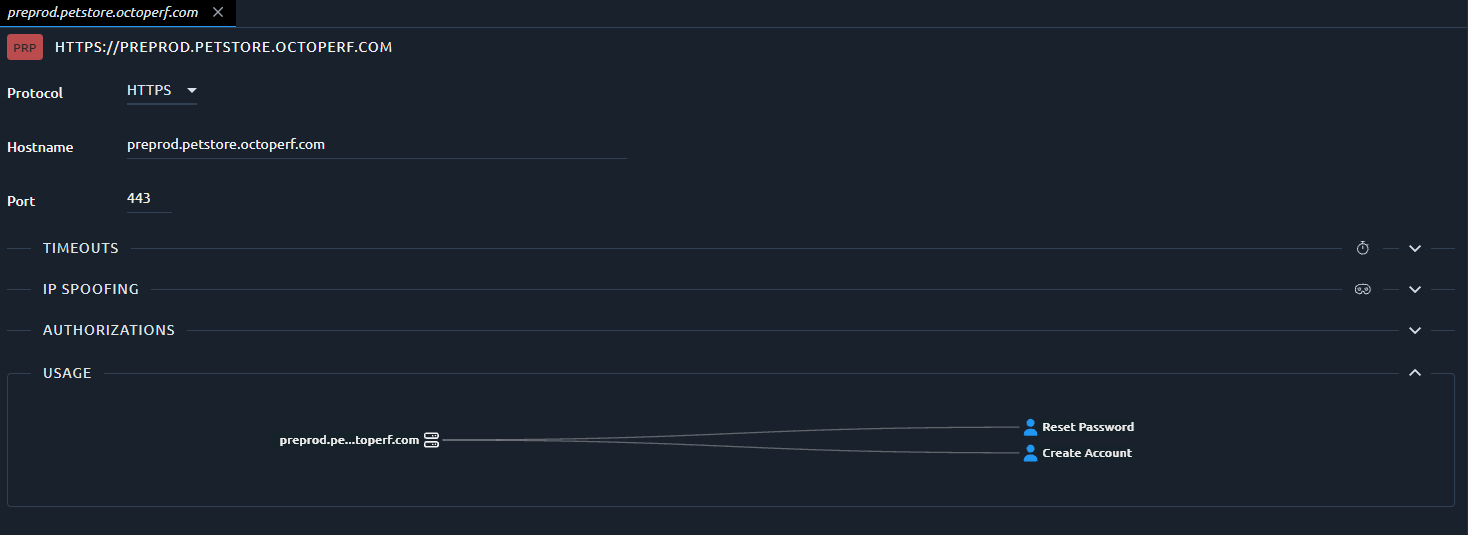
The Usage menu will help you visualize how by which Virtual Users your server is actually used in your project. This is a good way to anticipate which VUs will be impacted by your modifications.