On-Premise Agents
Introduction
An On-Premise Agent is a small Docker container running on a physical machine. It provides the following features:
- Monitor your system: monitor various parts of your system,
- Load Generator: start / stop / remove JMeter containers to run your load tests.

The Agents table shows the following information:
| Column | Description |
|---|---|
| State | Green when connected to the server. It is Red when the agent was disconnected less than an hour ago. |
| Name | Name of the docker container running the docker-agent. |
| IP | IP address of the computer running the agent. Several agents can run behind a single IP, but make sure they are not on the same machine otherwise they will step on each other. |
| Provider | Name of the Provider running this agent. |
| Region | Name of the Region in which this agent was launched. |
| Free Memory | Percent and available memory on this machine. Only this amount of memory is available for tests, if it is low even at rest, then you need to stop other processes on the agent machine. |
| Containers | Number of Docker containers running on this machine. This counts OctoPerf containers and also other containers you might have on this machine. |
| Last Update | When the agent has been updated for the last time. |
Warning
The Name, Provider and Region of an agent cannot be updated, you must re-install the agent to update them.
Start an agent
The following procedure explains how to launch an on-premise load generator:
- Create an On-Premise Provider,
- Back to the providers list, click on the Add Agent button,
- Select the Region where the agent will be running,
- Select the Operating System (Windows or Linux),
- Follow the instructions related to the OS.
This procedure must be followed again every time you want to install another agent otherwise your agents will share the same display name, making them harder to identify. Changing the name inside the command line will only update the docker container name, not the name we use in OctoPerf (it is embedded in the token). This is especially important if you install several agents behind the same IP.
Warning
Only a single agent per host must be launched. Having two agents will only use more resources and make them both slower. You may also experience issues like auto-upgrade failure, or race condition during test launch.
Windows
OctoPerf agents run on linux Docker images. For that reason it is only possible to execute OctoPerf agents from windows machines through linux emulation. Once you have a linux VM running, refer to the linux section of this documentation.
Warning
Installing an agent on a linux virtual machine is perfectly suitable for evaluation purpose but in the long run it is harder to maintain than a native linux agent.
WSL2
If you are running the latest versions of windows 10 you can check our WSL2 tutorial. WSL2 provides an efficient way to abstract the linux virtual machine and run docker almost seamlessly.
Linux

OctoPerf agents run on Docker. If you already have docker on your Linux machine you can skip the first command line.
- Click on the
wgetcommand to copy it, - Paste it on your terminal to install Docker,
- Click on the
dockercommand to copy it, - Execute the command on the target computer.
The Agent should appear in the list in a couple of minutes. Otherwise you can refer to the troubleshooting section.
Networking
An OctoPerf Agent requires Internet access for two requirements, fetching docker images and connecting to its server.
Warning
Make sure you do not go through a proxy when accessing the application under test. Otherwise you could be load testing the proxy and cause network issues inside your organization.
Docker images
Docker images will be fetched from Dockerhub by default. Because of this you will most likely end up in one of the following situations:
- Unrestricted Internet access: No action is required,
- Internet access through proxy: You must direct all traffic from docker through the proxy. The procedure is detailed in docker documentation,
- Your organization has its own private docker registry: You need to change the docker registry when executing the command line if it's not already configured and get the OctoPerf Images to your private registry,
- No internet access possible: Check our offline installation guide for more details.
OctoPerf server
The OctoPerf agent will need to communicate with its server. The traffic always originates from the agent, so it's a one-way route to open:
- Saas: Firewall outgoing rules must allow the agent to send HTTPS (443) requests to https://api.octoperf.com,
- On premise infra: Firewall rules must allow traffic between the agent and the server over HTTP (80) or HTTPS (443) depending on how your on premise infra is configured.
The Agent itself can be configured to use a proxy to communicate with its OctoPerf server via environment properties when running the agent. The agent is a Java Program :
-e HTTP_PROXY='hostname': the host name of the proxy server (HTTP),-e HTTPS_PROXY='hostname': the host name of the proxy server (HTTPS),-e NO_PROXY='': a list of hosts that should be reached directly, bypassing the proxy.
If your proxy is SSL-Secured, use https instead of http. For a more complete documentation, see Configuring Proxies documentation.
Warning
OctoPerf agents reuse the docker proxy by default. If you already defined the proxy at docker level, this procedure is not required. Except if you want to bypass the docker proxy instead.
Configuration
The agent can be configured using environement variables. You can specify an environement variable within the agent docker command using --env or -e parameter. See Docker Run for more information.
The agent supports the following environment variables:
AGENT_TOKEN: required. unique token generated by the server, used by the agent to authenticate itself when registering on the server,SERVER_URL: required. Location of the OctoPerf server,octoperf.auto-update: optional. Default totrue. Whenever the agent should upgrade itself when a new version is available.-e SERVER_PRIVATE_ROOT_CERTIFICATE="true": optional. Required to ignore errors caused by SSL certificates signed by self / private root certificates used by the machine hosting the agent.
The agent has the following volume mappings:
/var/run/docker.sock:/var/run/docker.sock: optional. Gives access to the docker service on the host machine. It's used to start / stop JMeter containers on the host.
Warning
The agent must be upgraded manually when the docker.sock volume mapping is not present.
Agent Containers

By clicking on the inspect button on an agent, the Inspect Agent panel appears. It provides a Containers Table that displays the containers currently running on this agent machine.
When selecting a container, container logs are displayed. Those information are mostly provided for debugging purpose.
You can also hover the container to and click Terminate to terminate it. If you terminate the docker-agent container, you will stop this Agent.
Warning
Terminating a container can have an impact on tests that are running. Make sure to only terminate containers that are idle or stuck.
Stop an agent
To stop an agent you can use the Inspect Agent screen to Terminate your agent through our UI.
Or from the Linux host:
- Connect on the machine running the container through a Terminal (Linux),
- Find the container within the list of running containers by running
docker ps -a | grep docker-agentcommand, - Copy the
containerIdand run the commanddocker stop <containerId>.
The agent should be marked as DOWN within a few minutes:
- Agents down for a while (more than 1 Hour) are automatically removed, this delay aims to avoid agents flashing in and out of existence upon any network issue,
- Restarting a stopped agent will make it reappear on the server again in
UPstate, as long as its docker container was not entirely removed.
Troubleshooting
The following steps require that you open a terminal and enter commands on your linux machine.
My agent does not appear in the agents list
First, make sure you have successfully installed Docker and launched the agent command on the machine.
Display the Agent Logs
First, display the container status and its containerId:
docker ps -a | grep docker-agent
You can then proceed to check the agent logs for error messages:
docker logs -f <containerId>
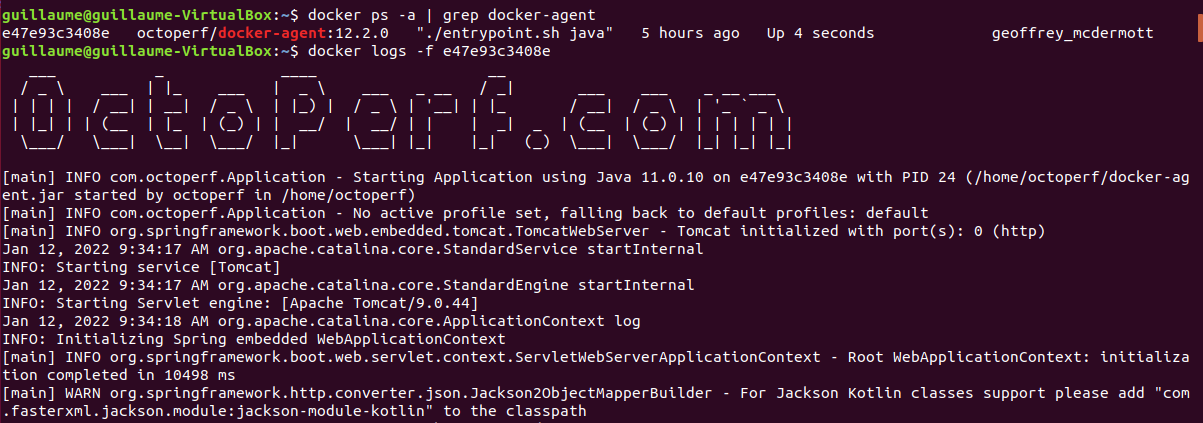
The agent logs will tell you if it's a connectivity issue or something else.
Typically, messages like :
- No route to host,
- Failed to connect,
- Unknown host.
All indicate a network issue when communicating with the OctoPerf server. In that case try:
- Disabling any firewall,
- Revert any change you've made to the iptables,
- Use your server IP instead of DNS name in the agent command line.
Or move on to the next section to further debug the issue.
Debug connectivity issue
You should be able to retrieve the list of Workspaces from the machine hosting the OctoPerf docker agent. Calling the REST API ensures that the Agent is able to communicate with the backend.
Info
If you have an On Premise server, replace api.octoperf.com with its address.
Run the following command:
curl --header "Authorization: Bearer API_KEY" -v https://api.octoperf.com/workspaces/member-of
You API key can be found in the OctoPerf application profile section.
You may also run this command from the inside of the agent Docker container:
docker exec -it <containerId> /bin/bash
Once connected to the container shell:
apt-get -qq update
apt-get -qq -y install curl
curl --header "Authorization: Bearer API_KEY" -v https://api.octoperf.com/workspaces/member-of
If you can't connect to the API then this is proof that you have a network connectivity issue from the agent to your server. Make sure the network route is enabled and/or whitelisted.
Remove and recreate the agent
Delete the existing agent by running the following commands:
docker ps -a | grep docker-agent
docker rm -f <containerId>
Then proceed to reinstall the agent using a newly generated command line. If the token used in your installation command line is outdated, this should fix it.
Warning
If the agent machine is used for other docker containers, it's better to locate the OctoPerf images and delete them specifically.
Switching Logs to Debug
In case the default logs do not give enough information you may start a new agent with this environment variable added: -e JAVA_OPTS="-Dorg.slf4j.simpleLogger.defaultLogLevel=debug".
This will activate DEBUG logs and may help you find out what is going on.
Increase heap size
If you messages like this in the log, you might need to increase the docker-agent Heap memory:
java.lang.OutOfMemoryError: Java heap space
The default memory size of a docker-agent is 256 Mb, to increase it to 1 GB add a environment variable right before the agent token in the installation command line:
sudo docker run -d --restart=unless-stopped --name XXXX -v /var/run/docker.sock:/var/run/docker.sock -e JAVA_OPTS="-Xmx1g" -e AGENT_TOKEN='XXXX' -e SERVER_URL='XXXX' octoperf/docker-agent:XX.XX.X
Warning
This is only required for large monitoring since that's the only operation that can require large amounts of memory on the agent. If you see this message in a JMeter container logs, or during a test, consider changing the memory configuration of the provider instead.
I'm using podman instead of docker
In that case there's a few changes you have to make.
Edit the command line
Make it look like this:
Command line
sudo podman run -d --restart=unless-stopped --name XXXX -v /var/run/podman/podman.sock:/var/run/docker.sock -e AGENT_TOKEN='XXXX' -e SERVER_URL='XXXX' docker.io/octoperf/docker-agent:XX.XX.X
sudo docker run -d --restart=unless-stopped --name XXXX -v /var/run/docker.sock:/var/run/docker.sock -e AGENT_TOKEN='XXXX' -e SERVER_URL='XXXX' octoperf/docker-agent:XX.XX.X
Warning
Make sure to replace all the XXXX with values from the docker command line you got from OctoPerf's UI.
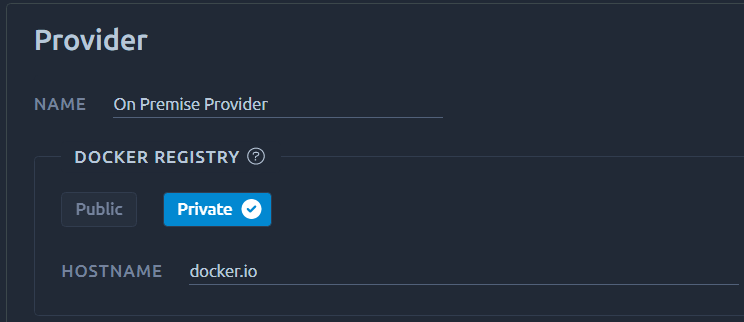
Custom registry
You will also most likely have to use docker.io as a custom registry in the provider: