Amazon

OctoPerf can automatically start and stop Amazon EC2 instances on-demand using your own Amazon AWS Account.
Amazon Elastic Compute Cloud (Amazon EC2) is a web service that provides secure, resizable compute capacity in the cloud. It is designed to make web-scale cloud computing easier for developers.
Prerequisites
In order to setup Amazon EC2 in OctoPerf EE, the following items are required:
- Amazon AWS Account: The account needs full access to EC2, VPC and IAM Management,
- Access Key and Secret Key: this pair is required to allow OctoPerf EE Interact with your AWS Account.
IAM User

Create an IAM User which has the following Permissions:
- AmazonEC2FullAccess: full access to Amazon EC2,
- AmazonVPCFullAccess: full access to Amazon VPC.
How to create an IAM User dedicated to OctoPerf EE:
- Click on your account name in the top-right corner, then select
My Security Credentials, - Click on
Usersin the left menu, - Click on the
Add Userbutton, - Enter
User name, Example:octoperf, InAccess TypeselectProgrammatic Access, then click onNext, - Select
Attach Existing Policies directly, - Check both
AmazonEC2FullAccessandAmazonVPCFullAccess, then click onNext, - On the review panel, make sure the user is configured as previously explained,
- Finally, click on
Create User.
Copy the provided Access Key ID and Secret Access Key in a safe location. We'll use them at the end of the procedure to create the Amazon Provider.
VPC Setup
OctoPerf EE provisions only Amazon EC2 compute instances running inside an Amazon Virtual Private Cloud. Most modern EC2 instances like m4.xlarge or m5.xlarge are running exclusively inside VPC.
The following sections are explaining how to setup and configure properly VPCs along with its subnets in each region.
Info
The steps below must be repeated for each AWS Region you would like to use to provision load generators.
Create a VPC

How to create a VPC:
- Switch to Amazon VPC service from the AWS Management console,
- Click on
Add VPC, - Name Tag: enter the name you want. Example: the name of the region,
eu-west-3in my case, - IPv4 CIDR block: enter
10.0.0.0/16(or any other private network with/16mask like192.168.0.0/16). - Tenancy: leave as
Default(which is multi tenancy).
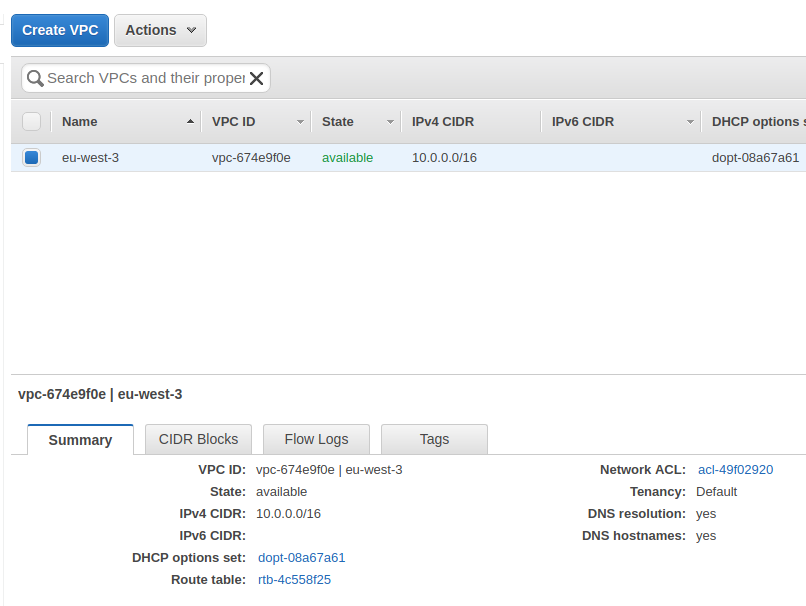
Store the VPC ID in a text file along with the region it belongs to. Here our VPC ID is vpc-674e9f0e, in region eu-west-3.
Create Subnets
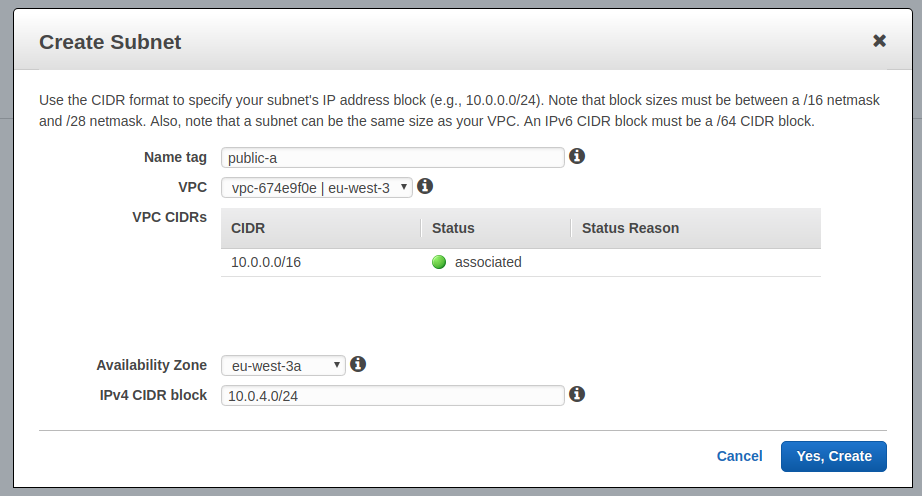
For each region availability zone:
- Click on
Add Subnet, - Name Tag: I suggest naming it after the availability zone, like
public-afor zonea, etc, - VPC: select the previously created VPC,
- Availability Zone: select the relevant zone,
- IPv4 CIDR Block:
10.0.1.0/24for zonea,10.0.2.0/24for zoneb, etc. - Click on
Yes, create.
You should end up with one subnet per availability zone.
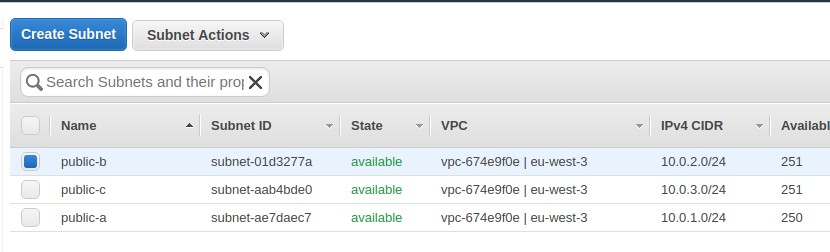
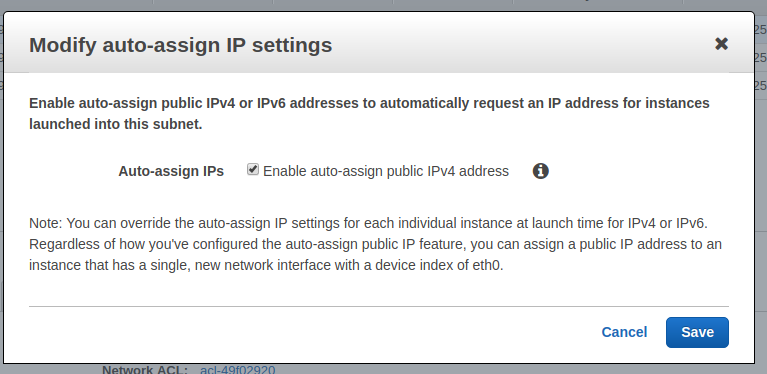
Now, we must configure each subnet to auto-assign a public IP to each instance:
- Right-click on each subnet,
- Select
Modify auto-assign IP Settings, - Check the box
Enable auto-assign public IPs, - Click on
Save.
Store the subnet ids in a text file with the region and VPC ID they belong to.
Route Table
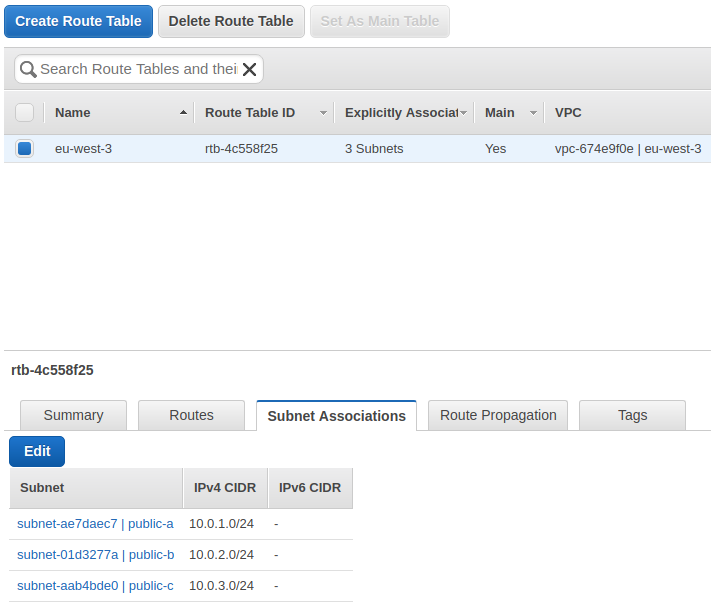
The route table is necessary to route traffic inside the VPC.
How to create a route table:
- Click on
Create Route Table, - Enter the Name and select the VPC previously created,
- Click on
Yes, create.
Then, Edit the router table subnet associations: associate all the previously created subnets by checking them.
Internet Gateway
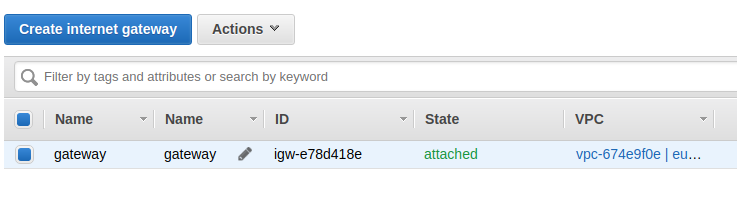
The internet gateway provides an internet access to instances inside the VPC.
How to create an Internet Gateway:
- Select
Internet Gateways, - Click on
Create Internet Gateway, - Enter any name then click on
Yes, create, - Right-click on the IG, then select
Associate to VPC, - Select the VPC previously created.
We're now done with the VPC setup. Now, we need to configure Amazon EC2.
EC2 Setup
Amazon Machine Image
An Amazon Machine Image (AMI) provides the information required to launch an instance, which is a virtual server in the cloud. You must specify a source AMI when you launch an instance.
OctoPerf requires an AMI with Docker already setup. As a reminder, the prerequisites are:
- Ubuntu LTS Operating System or newer,
- Docker CE latest stable release installed,
- a name starting with octoperf- for your AMI.
We suggest to use an automation tool like Packer to create Amazon AMIs in each region in just a few minutes. You can use our pre-made packer script:
- Edit
variables.pkrvars.hclwith a text editor and provide your own settings (access / secret keys, vpc and subnet ids for eu-west-1), - Edit
amazon.pkrvars.hclif you want to limit regions to where the AMI is copied once built,
From the same directory, the Makefile provides the following targets:
- make amazon.check: check packer script validity,
- make amazon.build: create amazon ami in eu-west-1 and copies it to all other regions.
Packer 1.9+ is required.
Store the AMI ID (should look like ami-12d456f8a) along with the region in a text file.
Security Group
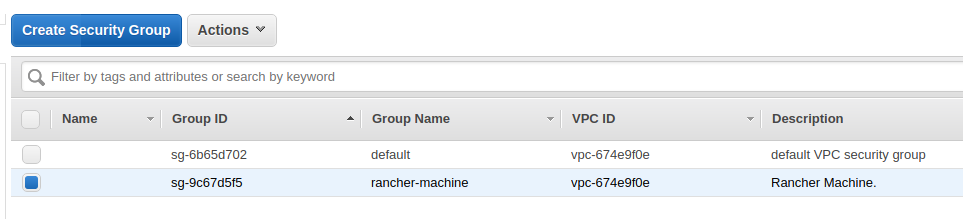
Create a security group with the following settings:
- Name: any,
- Description: any,
- VPC: select the VPC created previously,
- Inbound Traffic Rules: no inbound traffic rules are required, however you can enable SSH for your own usage,
- Outbound Traffic Rules: leave as
All TrafficandAllprotocols enabled.
You can also use the already existing default security group and modify it according to your needs. Store the security group ID along with the VPC and subnet IDs for the given region in a text file.
Key Pairs
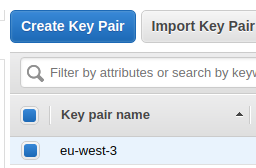
Create a key pair named exactly as the region. Example: eu-west-3 in region eu-west-3. OctoPerf EE automatically associates the provisioned instances with the key pair named as the region (to easily SSH into it if needed).
OctoPerf AWS Provider
At this stage, you should end up with a text file containing the following information per region:
- Region ID (Example:
eu-west-3), - VPC ID (Example:
vpc-125efd2), - Subnet IDs per VPC (Example:
subnet-158def) - AMI ID (Example:
ami-123efc78), - Security Group ID (Example:
sg-5468efa4).
You can now setup the Amazon Provider using the Providers configuration panel. Provide all the information above during the regions and availability setup. Double-check all information provided are correct.
Access
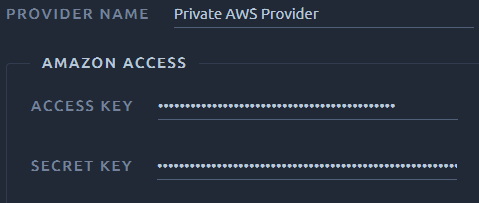
Amazon provider has the following settings:
-
Provider Name: the name as displayed when selecting the provider for a test run.
-
AWS Access Key: an AWS Access Key,
- AWS Secret Key: an AWS Secret Key.
Locations

Using the previously entered credentials, OctoPerf scans all the regions and looks for:
- VPC networks and subnets: only instances inside a VPC can be run by OctoPerf,
- Images: an Amazon AMI with name starting with
octoperf-must be present in each region. This image must have Docker preinstalled, - Security Groups: a security group associated to a VPC with outbound traffic must be present.
Each Region can be edited and all the automatically detected settings can be changed.
Info
The search functions are detailed in this section of the navigation page.
Elastic IPs
Elastic IPs can be allocated using Dedicated IPs management panel.
Instance Tags
See Amazon Instance Tags backend settings for more information.